How to Safely Remove Mold From Your Home: A Step-by-Step Guide
Dealing with mold? You’re definitely not alone—and while it might seem overwhelming, tackling it properly can make a world of difference for your health and home. Let’s walk through the process together, breaking it down step by step and making sure you know exactly what to do (and what not to do).
Step 1: Spotting the Mold and Figuring Out the Damage
First things first: How do you know if you really have a mold problem? Here’s what to look for:
– Weird smells: Musty, damp, or “old basement” odors are a dead giveaway.
– Strange spots: Mold usually looks like black, green, or white splotches—sometimes fuzzy, sometimes slimy.
– Water stains: Discoloration on ceilings, walls, or floors can mean mold is lurking underneath.
– Places to check: Bathrooms, kitchens, basements, around windows—anywhere that’s humid or recently had a leak.
Tip: Some molds are more dangerous than others (like Stachybotrys, a.k.a. “black mold”). If you have health concerns or the area is larger than about 10 square feet, consider calling a professional, like PureOne Services Mold Remediation in Minneapolis.
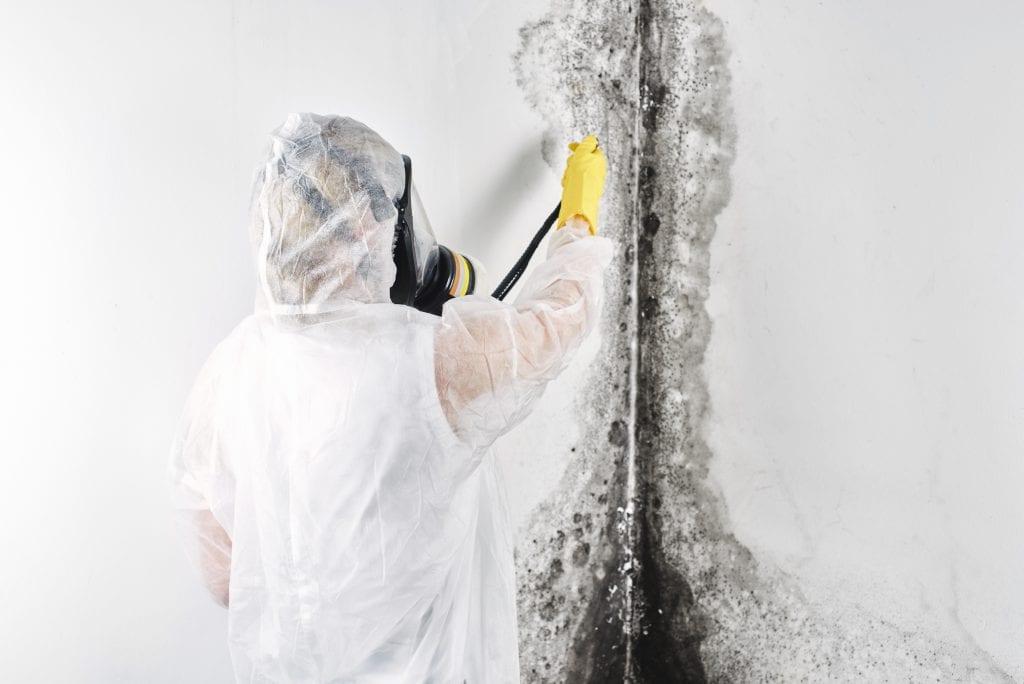
Step 2: Prepping Your Space (and Yourself!)
Before you start scrubbing, take a minute to set things up for safety and success:
Clear the Area
– Move furniture, rugs, and personal items out of the way.
– Cover anything you can’t move with plastic sheets.
Set Up a “Work Zone”
– Close doors or hang plastic to keep spores from spreading.
– Open windows or use fans for ventilation (just don’t blow spores into other rooms).
Gear Up!
– Gloves: Rubber or nitrile are best.
– Goggles: Protect your eyes from spores and cleaning sprays.
– Mask: An N95 respirator is ideal (not just a cloth mask).
Bonus Tip: Wear old clothes you can wash right away—or even toss if needed.
Step 3: Picking Your Cleaning Tools and Solutions
Let’s talk supplies. You have options!
Natural Solutions
– White vinegar: Cheap, safe, and effective on most surfaces.
– Hydrogen peroxide: Great for disinfecting, but test on surfaces first.
– Tea tree oil: Smells nice and fights mold, but can be pricey.
Commercial Cleaners
– Look for EPA-registered mold removers or fungicides—especially for bigger jobs.
Tools You’ll Need
– HEPA vacuum: Sucks up spores without blowing them around.
– Scrub brushes: For tough spots.
– Microfiber cloths: Trap spores better than regular rags.
– Buckets, spray bottles, and disposable bags: For mixing and tossing out debris.
Step 4: Getting Rid of the Mold—Safely!
Ready to clean? Here’s how to do it right:
- Contain the area: Keep doors closed, windows open, and plastic sheeting up.
- Vacuum first: Use a HEPA vacuum to pick up loose spores on dry surfaces.
- Scrub away: Spray your cleaner on the moldy area and scrub well. For porous stuff like drywall or carpets that are badly damaged, you might need to just cut out and replace.
- Rinse & repeat: Wipe with clean water, then dry thoroughly.
- Double-check: Look for any missed spots or signs of mold coming back.
Safety reminder: Never mix bleach and ammonia—it creates toxic fumes. And always wash your hands and clothes after you’re done.
Step 5: Keep Mold From Coming Back
You’ve done the hard part—now let’s keep that mold away for good!
Moisture Control is Key
– Use dehumidifiers: Aim for 30-50% indoor humidity.
– Ventilate: Run fans in bathrooms, kitchens, and laundry rooms.
– Fix leaks fast: Check under sinks, around windows, and in the attic after heavy rain.
Upgrade Materials If Needed
– Consider mold-resistant drywall or special paints, especially if you’ve had repeat issues.
– Replace any permanently damaged wood, carpet, or insulation.
Stay Vigilant!
– Regularly check for leaks or water stains.
– Clean up spills promptly.
– Keep gutters clear to prevent water from seeping indoors.
Quick Recap
– Spot the problem: Look, sniff, and check damp areas.
– Prep your space: Clear clutter and suit up.
– Choose your weapons: Pick the right cleaners and tools.
– Clean carefully: Contain, scrub, and dry.
– Prevent future issues: Control moisture and inspect often.
You’ve got this! Mold removal isn’t anyone’s favorite chore, but with the right steps and a little elbow grease, you can make your home a safer, healthier place. If the job feels too big or you’re worried about your health, don’t hesitate to call in a pro. Good luck!